IF YOU HAVE A BROKEN OR DAMAGED OR WANT TO UPGRADE THE DUST PORT ON YOUR SGK1, YOU CAN SWAP OUT THE BAD PART EASILY.
Dust Port removal
Follow these steps and images below. It is fairly straight forward. No tricky steps. Read through them to become familiar with the steps. It may save you a couple minutes for the task.
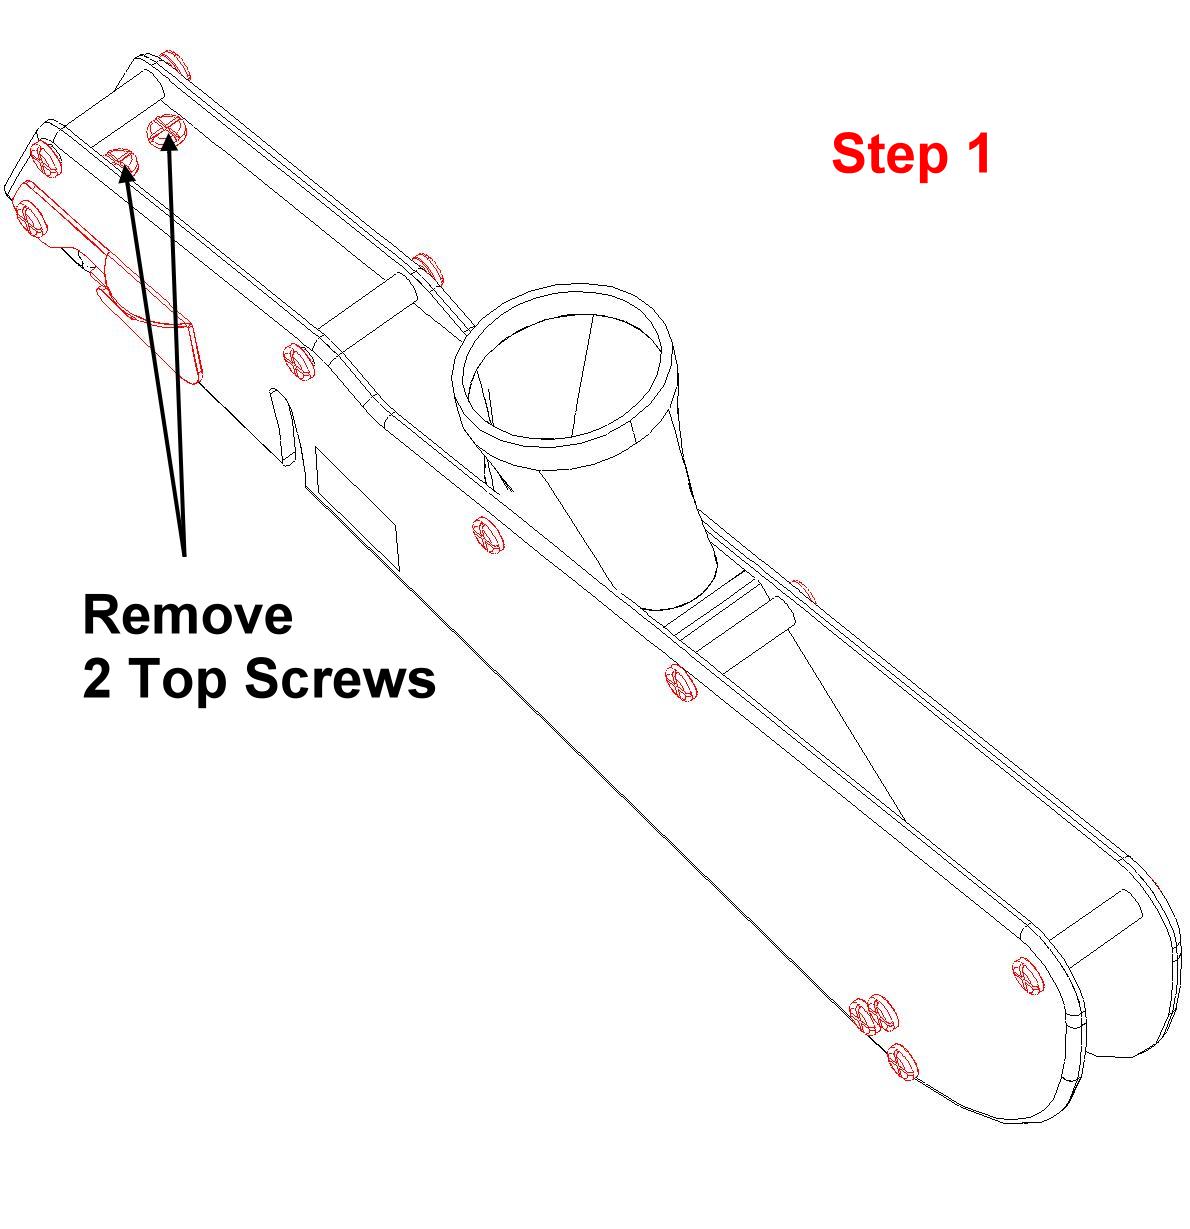
Step 1
Remove the two screws at the top rear. These screws secure the dust port plate to the tail plate.
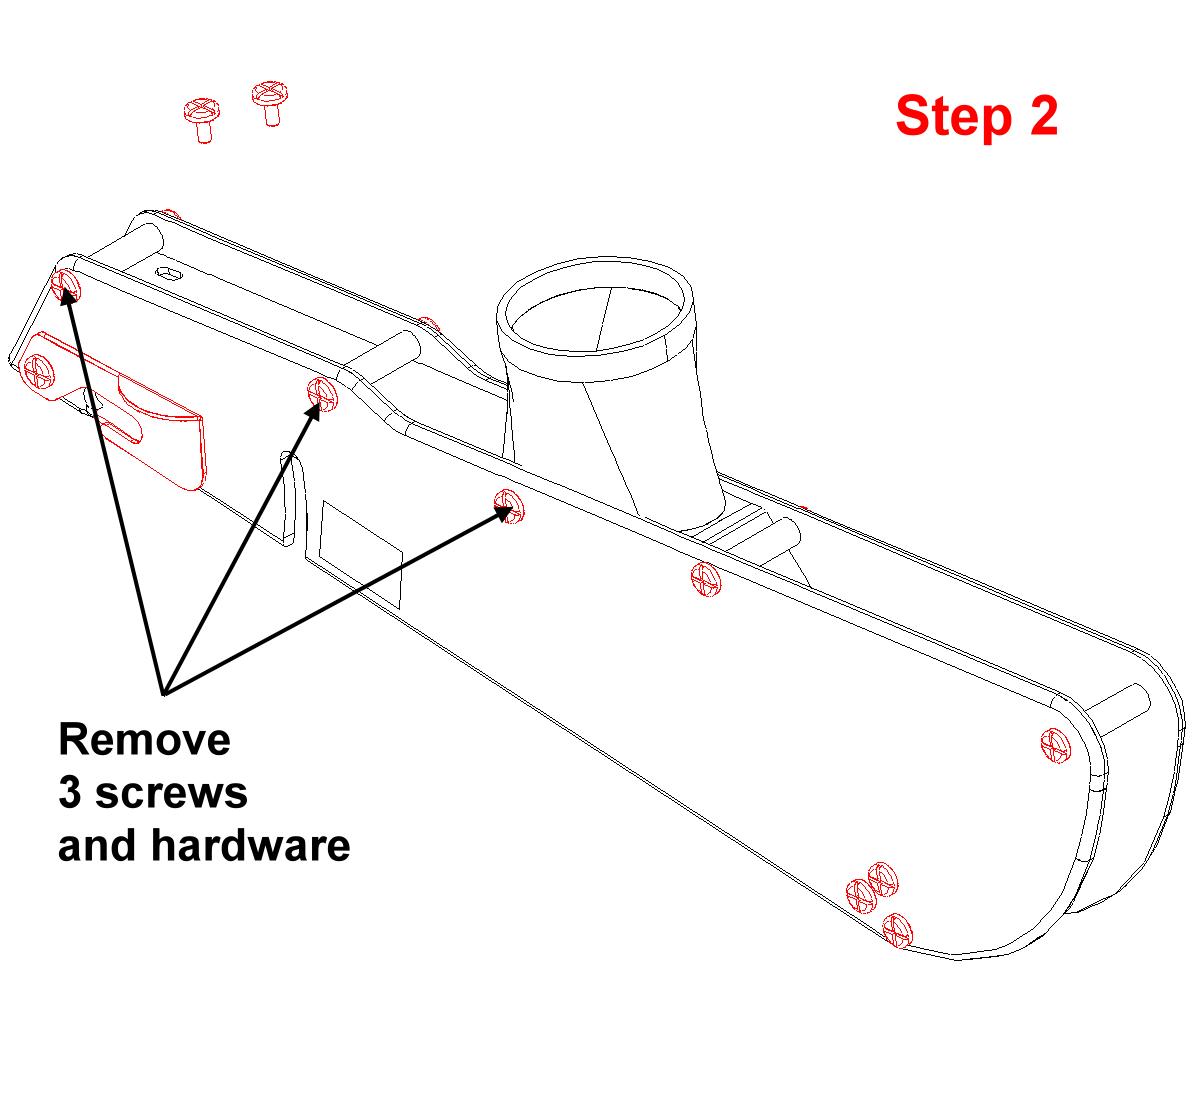
Step 2
Remove the top three screws at the rear left. The screws come out the left side. The barrel bolts come out the right. There are two spacers or standoffs that are clear or black plastic. These hold the guard halves the correct distance apart. Remove those as well. There is no spacer under the dust port. This is done to maximize airflow.
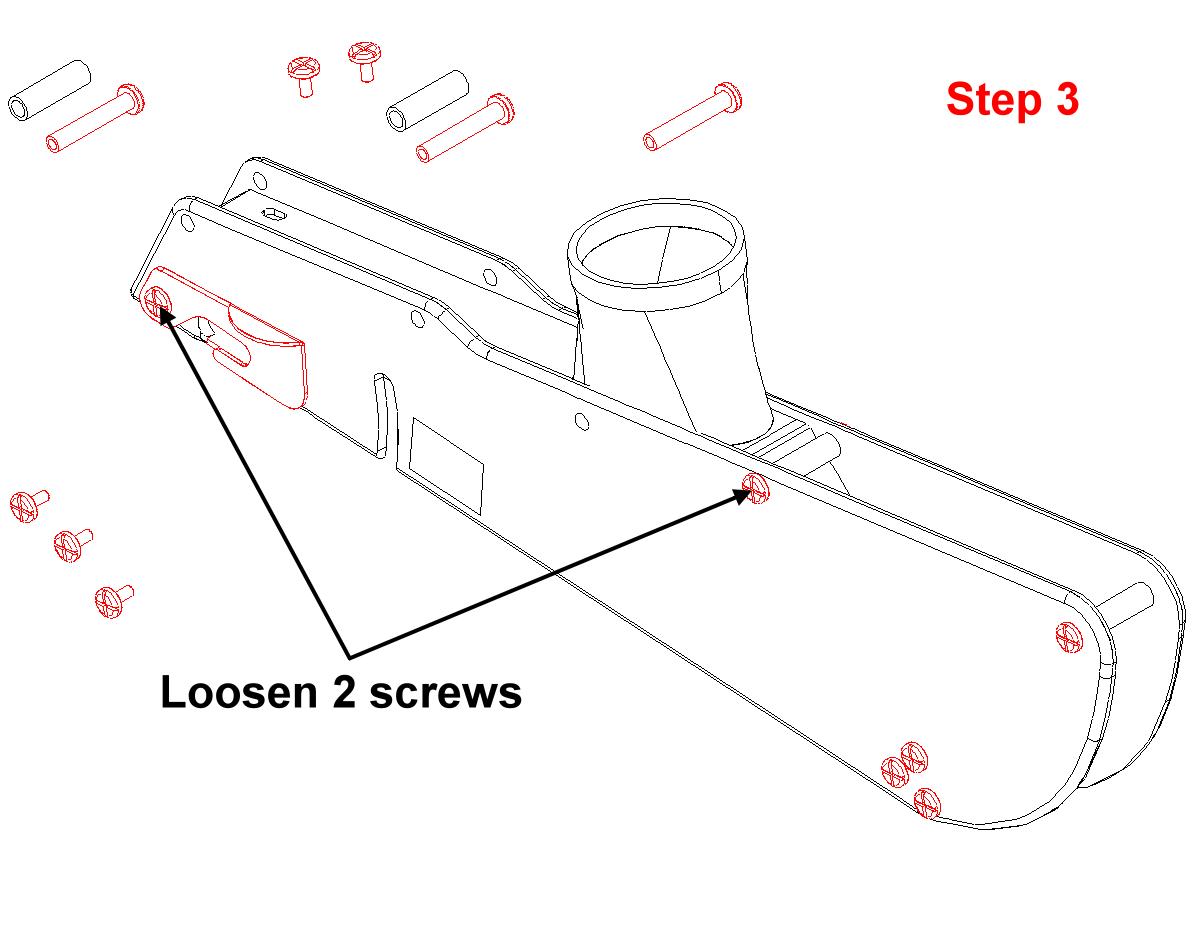
Step 3
Loosen these 2 screws. No need to remove them, but okay if you do. The bottom rear screw that holds the tail hook latch is a little longer than the rest of the screws. There is also a black nylon washer under that one for wear. There is no standoff at the bottom rear tailhook screw. The steel tail plate functions to hold the proper spacing for that instead.
Step 4
Pull the rear sides apart slightly. Then slide the dust port plate toward the rear of the guard.

Step 5
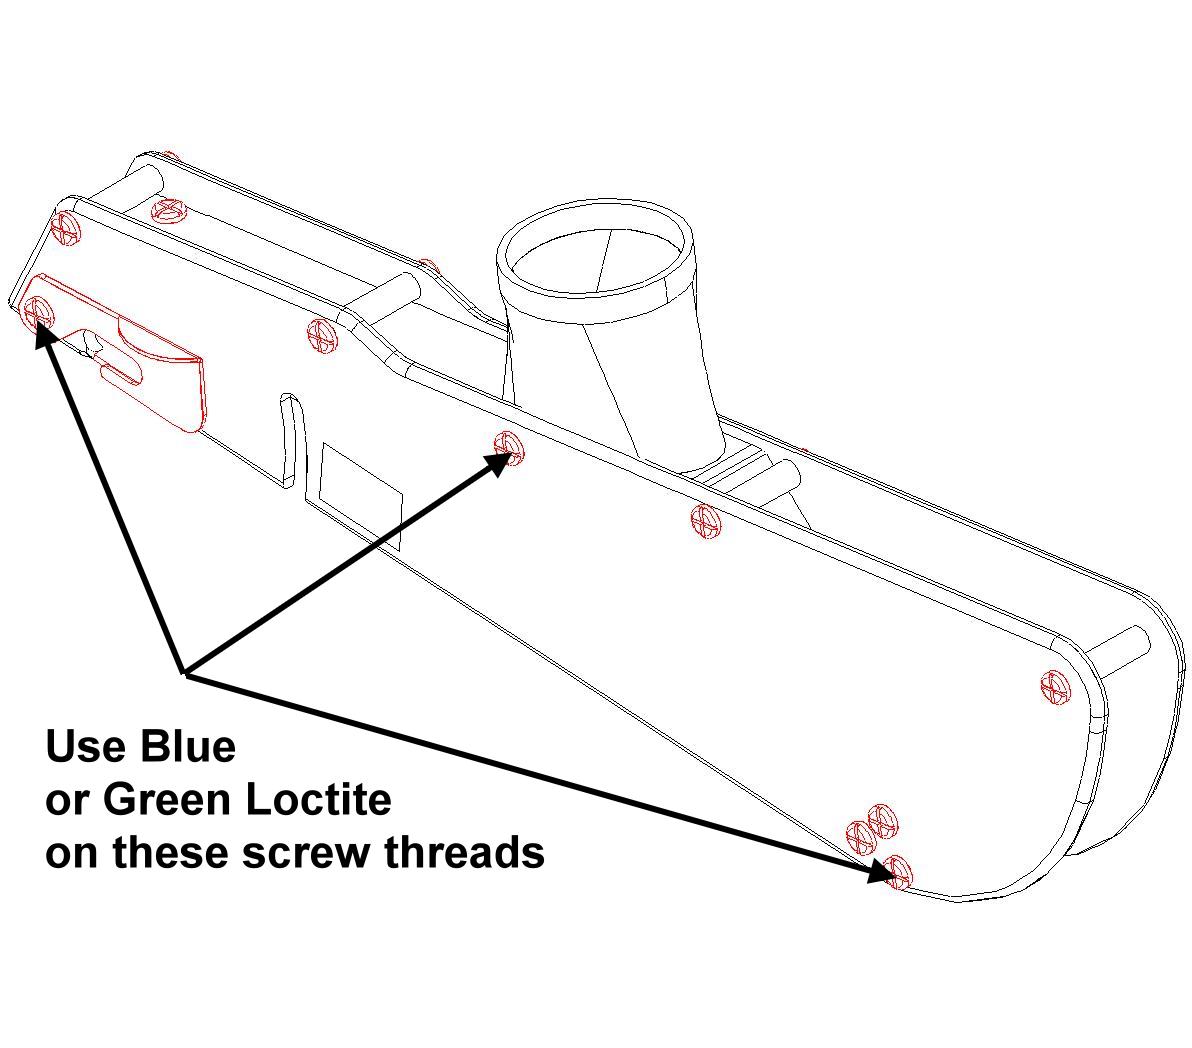
Follow the steps above in reverse to reassemble. The key points are that you get the new dust port plate slid into the dado correctly and that it is pushed fully forward so that there is no space between the front of it and the angled front plate. It would be a good idea to use some thread locker on the screws shown whenever they are removed. We do that here for original assembly as well. “Loctite” #290 is the green and #242 is the blue. The purple will also work. It is considered low strength. #222MS
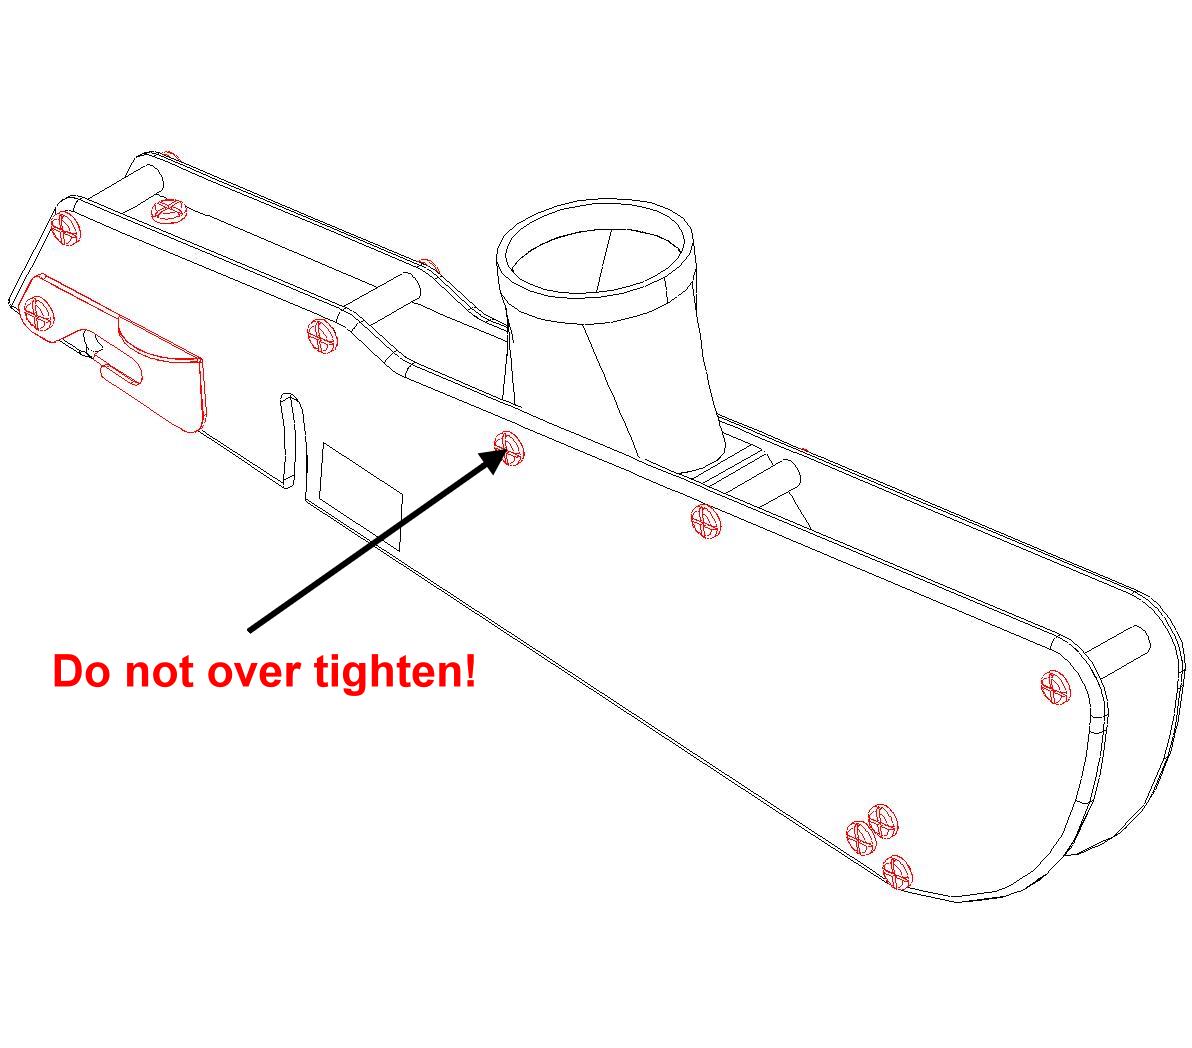
Step 6
Lastly, remember there was no stand off under the dust port. Eye ball that one when tightening so that the sides look parallel from front to back. Too tight and the sides will bow inward. Too loose and the sides aren’t secured well enough around the dust port. If you have any trouble or questions, don’t hesitate to email.