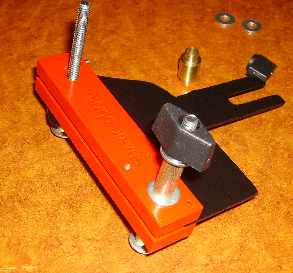
The following shows how the anti-kickback pawls are installed onto the clamp assembly.
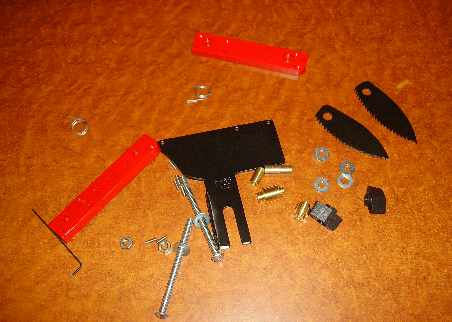
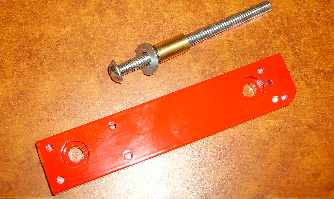
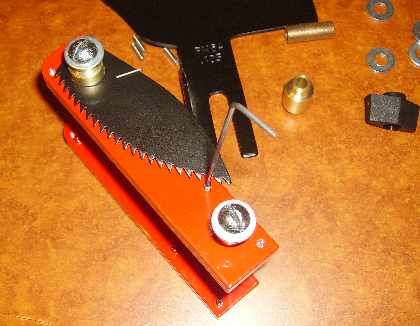
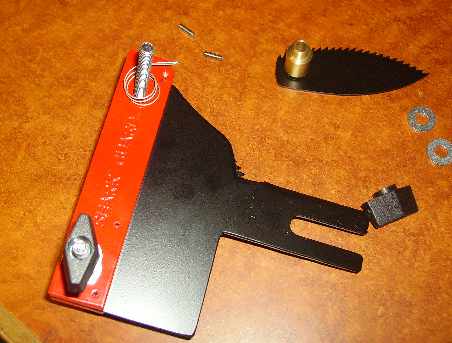
1. This image shows the parts scattered out. This all looks quite complicated, but it is really pretty simple. The steps below should make it fairly clear.
2. This is a parallel set screw that helps to keep the clamp halves from bending or binding on the bolt when they get tightened up on the splitter. All set screws are 8-32 thread. They may require some mild thread locker to maintain adjustment. I apply that here, but you may need to do this as well if they start vibrating loose. Not an issue on saws with very little vibration.
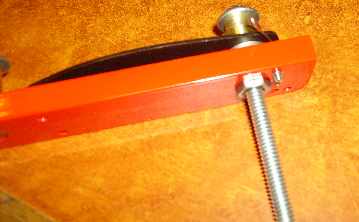
3. This is the front parallel set screw. There are only two for this. They install only in the right side of the clamp half. Right side as looking at it on the saw with the curved portion forward and down. The hex or allen wrench size is a 5/32″.
4. Next you add a washer to the 4″ models, none on other models. Then comes a 5/8″ by 3/8 inch bushing. Shorter bushings on the thin or SGK1 models. No washers are needed here for SGK1 models.
5. There are two thin 1/4 – 20 nuts that install inside each stud or bolt on the right clamp half. Don’t overtighten these. Just snug them up for now and tighten when complete.
6. No washers on the inside of the bushing on the right side clamp half.
7. This is the shorter of the two stepped bushings for the front. Both will be the same length on anything other than the 4 inch port. Bushings are the same for both sides on an SGK1 with any port size.
There is only a minor difference, but the pawl rides on the shortest step inside. The guard itself will ride on the outer step.

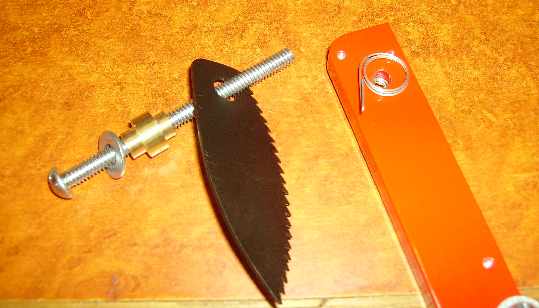
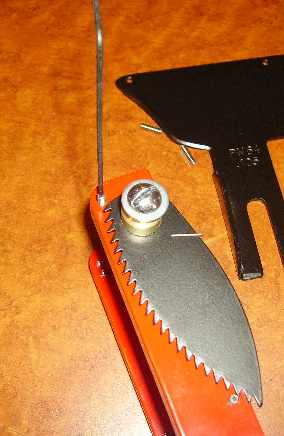
8. Pawl with the right side spring. There is a 3/32 inch hole in the front center of the clamp halves. This retains the straight bend of the spring. The pawls hooks into the ushape bend in the spring. It is easy to get the springs backwards. This side should look similar to what you see here.
9. Installing the front inner nut. You should insure that the brass bushing is seating against the clamp and not stuck on or held away by the spring.
10. Installing the right side pawl keeper set screw. This screw holds the pawls in the upright position when installing the splitters into the saw or when you don’t need the pawls for a particular cut. Adjust this so that the pawl is able to swing past it to rest on the stop screw shown in the next image. Spin the pawl CCW on this side to apply a bit of tension from the spring. Careful! These things are sharp. They do not require a lot of tension to work.
11. Installing the front right pawl stop set screw.
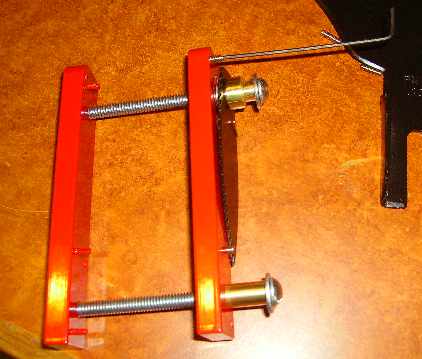
12. This image shows the approximate set screw adjustments for the stop and keep screws.
13. Once the right half is completed, you can put the splitter and logo side clamp onto the studs. Then install a washer on the rear stud followed by a 3/8″ brass bushing and another washer. Then tighten a knob on it to hold the assembly together.
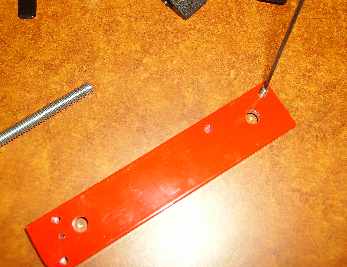
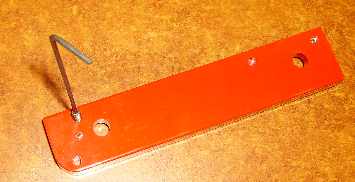
14. This image shows the remainder of the parts that will make up the front logo side pawl assembly. Start by inserting the logo side spring into the small hole as shown.
15. A washer may or may not be needed inside this next bushing. Insure though that the bushing doesn’t pinch the spring. Spin this pawl clockwise to add tension.
16. Installing the left or logo side pawl keep set screw once tension has been applied to the pawls. Careful! These things are sharp. They do not require a lot of tension to work.
17. Installing the left or logo side pawl stop.
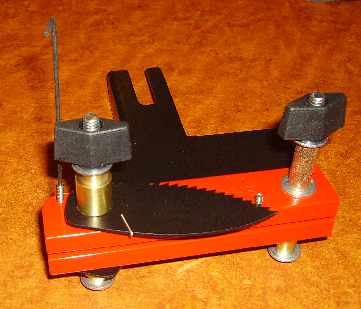
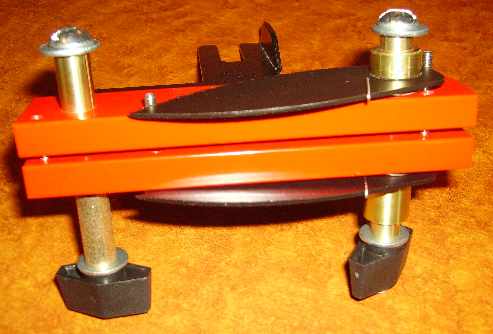
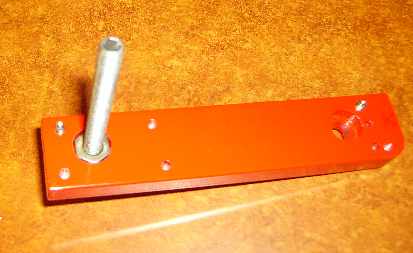
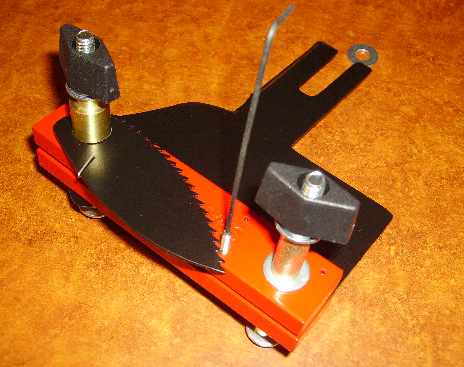
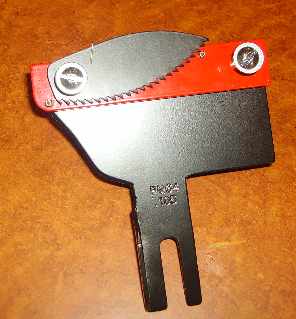
18. Left side view. Ready to install on the saw. When you want to swap splitters out, just loosen the two knobs and pull the clamp halves apart enough to disengage the 3 steel roll pins from the 3 splitter holes. The left side pawls will stay intact, but the right side may spring loose on you. You can do it without it popping loose, but takes a bit of practice. This is much easier on the newer SGK1 models. The splitters or riving knives have slots rather than holes.
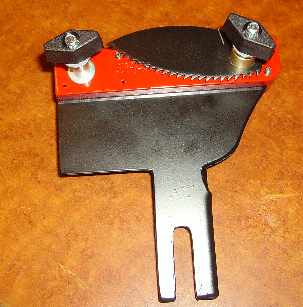
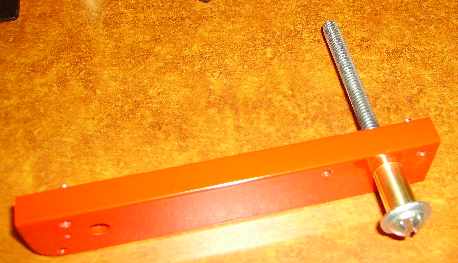
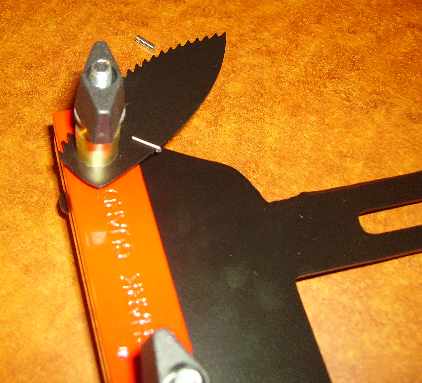
19. Right side of installed clamp and pawls.
20. Top side view. Be sure to snug up the two bolts. No need to be extra tight. Just snug. The knobs pull everything together. If you have any issues or questions about any part of this, just email and perhaps send some pictures of the issues. A drop of 3 in 1 machine oil between the pawl and the brass bushing periodically will insure that the pawls work as intended.